
The Notre Dame Cathedrals
Joshua Holko files another post from France
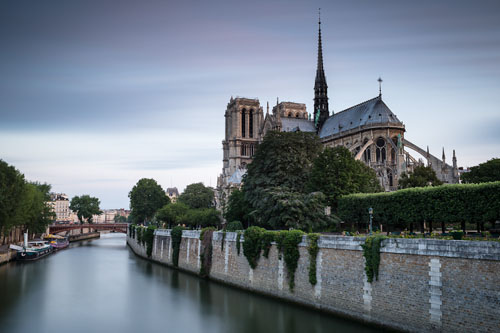
Paris is, of course, well known for its magnificent Notre Dame Cathedral, the sheer scale and majesty of which is biblically awe-inspiring. Photographing the Notre Dame, however, is a challenge. By break of day the building is surrounded by thousands of tourists streaming through its grand doors and climbing its towers, and the numbers do not waiver until nightfall. There is simply no opportunity to capture the building free from visitors. Because I wanted to do more than merely walk away with the usual tourist postcard photograph, I was left searching for alternatives.
In an effort to make a better photograph I decided I would get up before sunrise and try a long exposure from one of the bridges across the river Seine in the hope of capturing the Cathedral in a more peaceful and serene environment. This viewpoint is one I had not seen before and one in which I could utilize the river to place the Cathedral in context. Although the Cathedral is partially obscured behind the trees I like the angle for the added mystery. I used a ten stop ND filter to obtain a 4 minute exposure to soften the sky and create a sense of movement in the clouds and water.
As much as I enjoyed indulging myself in Parisian café culture it now feels good to be out in the countryside and away from the hustle and bustle of the city. This has been my first visit to France and it has been as picturesque and scenic as I was led to believe. With its manicured fields and gardens the French countryside is beautiful and its many small villages quaint and adorable.
Over the last few days I have spent some time in the Champagne region (where healthy portions of fine Champagne were sampled and keenly devoured), Reims and the small town of Ambois located in the Loire valley where I have visited a number of spectacularly opulent chateaus located nearby.
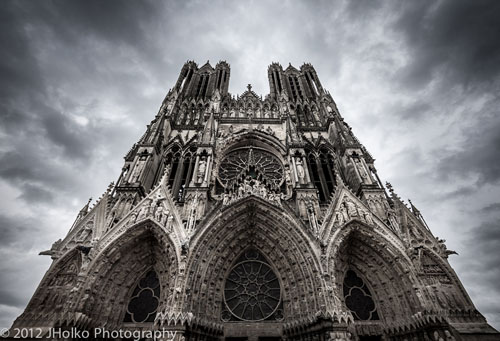
I was not aware that there is in fact a second Notre Dame cathedral located in Reims and was fortunate to stumble across it whilst driving though the town. The choice of how to photograph this gothic Cathedral struck me as I stood below its imposing form and leering gargoyles. I wanted to make this Cathedral appear to be both rooted to the earth and soaring toward the heavens in order to do justice to its gothic architecture and imposing stature. I accomplished this using Canon’s 17mm wide angle lens and pointing the camera up toward the towers to create an exaggerated perspective. This photograph was handheld since the use of tripods, even on the external grounds, is strongly discouraged. The key to making this work was a combination of the wide angle lens, camera angle and symmetry to create the desired effect. I was also fortunate to have some dramatic clouds and lighting which add to the atmosphere and enhance the Cathedral’s foreboding presence.
This trip has been a wonderful opportunity to shoot with the new 1DX camera which is continuing to surpass my expectations. It has the best metering and autofocus of any camera I have used. Tomorrow I will be heading for Dijon where I look forward to more photography with this remarkable new camera and of course some more “boudoir the grape.”
Canon 1DX - Making the impossible possible
A guest blog post from Joshua Holko reporting on location from Paris.
 "Paris has been the first opportunity I have had to shoot with Canon’s new 1DX multi-media powerhouse camera. I had only limited opportunity to test the camera before I departed for Europe because the camera arrived only a couple of days before my flight departed. With all the delays since its announcement in September last year I was having serious doubts whether Canon were going to deliver. I managed some initial tests to ensure there was no immediate problem with the camera and these proved very promising, with excellent results.
After two days in Paris and around 500 frames I can now report that the Canon 1DX has exceeded my expectations for low light and autofocus performance in every respect. One of the real highlights in Paris for anyone interested in history and architecture is its incredibly impressive cathedrals and churches. The sheer scale, grandeur, and majesty of Notre Dame, and others, make them wonderfully impressive subjects for photography. They can be hard to capture in their entirety as there is a fine balance between placing the structure in context and the creation of a mere postcard. Nevertheless, I enjoyed the challenge and I could happily spend many days prowling the streets and cobblestone alleys for new and different angles.
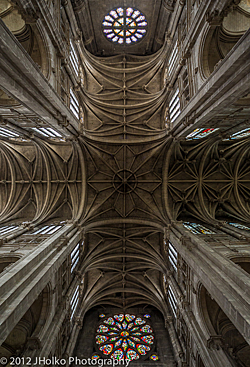
As impressive as the Cathedrals are externally, they are equally awe-inspiring on the inside. Unfortunately, all of them are extremely dark inside and tripod photography is forbidden (as is the use of flash – although, this last ‘law’ seems very poorly enforced) necessitating the use of high ISO photography to ensure sufficient shutter speeds and depth of field. It is not uncommon to have to push the ISO as high as 10,000 or even 25,600 in some cases to obtain 1/40th of a second at F4 in the darker areas.
This photograph was taken inside the Eglise Saint Eustache cathedral with the Canon 1DX and 17mm F4L TSE, handheld at ISO 6,400, 1/60th of a second, F 4.5. I want to emphasize that it was extremely dark inside the cathedral and that the light streaming through the stain glass windows was extremely hot. The dynamic range far exceeds the capabilities of any camera to record; yet the 1DX has managed to produce an excellent exposure without intervention from me. This photograph simply would not have been possible with such low noise with any previous camera I have owned or tested. The image has had only minimal post processing and noise reduction in Adobe Lightroom 4.1. There is virtually no appreciable noise of consequence in the RAW file, at least nothing that is not easily corrected with a small amount of noise reduction (a modest setting of 25 in Lightroom was used in this example to reduce the luminance noise grain – no color noise reduction was required). The results are simply astonishing and I am very much looking forward to the new opportunities created by the amazing capabilities of the 1DX. Although in this example I utilized the 17mm F4L TSE which is a manual focus lens I also shot several frames with the 24mm f1.4L MKII and 35mm F1.4L lenses, and in all cases the 1DX was able to immediately nail focus in near total darkness, center of frame. The era of shooting in the dark has truly arrived.
Although street and city photography is not my preferred landscape, I have very much enjoyed my time in the city of romance and rate it as one of the most beautiful and charming cities I have visited. There is a wavelength and ambience in Paris that I can immediately harmonize with. Its cobblestone streets are steeped in history and charm and this, combined with my love of the café culture, make it a city I could easily call home. I am looking forward to wandering its streets over the next few days before I head for Venice.
Au revoir for now…"
Joshua Holko wins big at the APPA
We're taking the opportunity to repost Moab Master, Joshua Holko's blog describing his four Australian Professional Photography Awards

"Once a year the annual APPA Australian Professional Photography Awards are held in Australia. This year they were conveniently held in my home state of Victoria. The event is sponsored by Canon Australia and is run by the AIPP Australian Institute of Professional Photography. Widely regarded by many as the toughest photographic competition in the world today APPA remains one of the few world wide competitions where the finished ‘print’ is judged (in the vast majority of categories) by a panel of professional photographers who are each considered experts in their chosen specialities.
...This year I was thrilled to receive two Silver with Distinction awards and two Silver Awards for two photographs from Antarctica and two from Iceland respectively. Each of these prints was printed on my personal favourite paper – Moab Somerset Museum Rag"
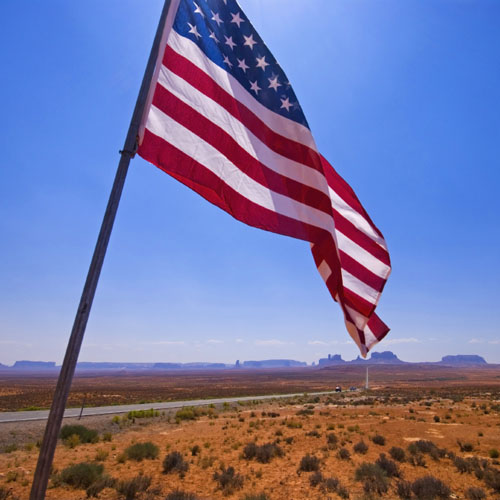
Happy Independence Day
NEW Slickrock 11x14 sheet size
![]() Deep from within our R&D facility (somewhere in the vicinity of La Sal mountains) we're excited to introduce the new 11”x14” sheet size for our Slickrock Metallic Pearl 260 paper.
Deep from within our R&D facility (somewhere in the vicinity of La Sal mountains) we're excited to introduce the new 11”x14” sheet size for our Slickrock Metallic Pearl 260 paper.
The new 11x14 Slickrock format was introduced as a direct response to our customers seeking the new size for portfolio printing. Considered a standard for portfolios and framing, the 11x14 format matches original large format cameras, and as a result, became one of the default image presentation formats.
Designed for photographers seeking to enhance their images with a metallic look, Slickrock Metallic Pearl 260 transforms an image into lifelike, almost 3D quality. Black & White images shine on this new paper producing deep dark blacks and ultra-bright highlights.
The new 11x14 Slickrock Metallic Pearl 260 is available in 25 sheet boxes. The rest of the Slickrock range consists of 50 sheet boxes - sized 5”x7” 8.5”x11”, 13”x19”, A2 and A4 - and rolls sized 17, 24 and 44 inches wide by 100 feet long.
H.D.R. Photography for the Realist (NYT Article)

A few weeks with Andy Biggs on Safari

Three to four times a year, Moab Master (and Moab's technical guru) Andy Biggs heads out to Africa to lead photographic safaris. We gain some insight into these safaris through Andy's blog where he relates the day's adventures and publishes some breathtaking photos.
Andy's current tour is coming to a close, which is why we thought it appropriate to link back to his blog to read the past 16 days of his trip. Enjoy!
Free art seeking quality paper
 We thought this was pretty cool and wanted to repost (from designtaxi.com) for our Moab friends. This print would look rather good on Moab...
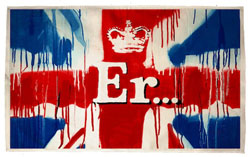
In celebration of the Queen’s Diamond Jubilee, UK street artist Banksy has released an exclusive print absolutely free for all.
The free art piece, entitled ‘Er…’—available from Pictures on Walls—is meant to be easily downloaded, printed and applied to wherever users see fit.
“An exclusive download for the more ambivalent patriot. Simply save off the file and take to your nearest branch of prestoprint where it can be transferred onto a mug, tea towel or other quality item. Alternatively print onto a piece of paper, sellotape to a barbecue skewer and wave in an ‘ironic’ way as the Queen drives past,” the description of the art piece said.
Take a summer workshop with a Moab Master
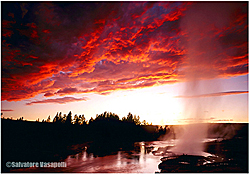 In the upcoming summer workshops, Salvatore Vasapolli leads some of his most exciting workshops to some of the world's and America’s most exciting parks, such as Yosemite and Glacier National Parks with their high peaks, waterfalls and cliffs.
Acadia National Park is more diminutive, but its cliffs fall into the sea. Mono Lake of California may be the most bizarre with its Tufa’s and desert. And don't count out the rugged mountains and cliffs of the Delaware Water Gap in Pennsylvania and New Jersey with its natural beauty - only an hour from New York City or two hours from Philadelphia, PA.
Learn the best camera and composition techniques in all these magnificent locations under the guidance of Salvatore.
A description of a few these workshops can be found here:
Yosemite National Park and Mono Lake
Other workshops located around the country can be found here.
Expressive Printing: Monochrome Options
Achieve the tonal nuance and character of the finest silver prints when making digital prints in this August workshop lead by George Schaub.
The class concentrates on monochrome printmaking, which includes many styles and approaches, from expressionistic to naturalistic to highly graphic, and includes the use of numerous plug-ins for creating foundation images, using duotone and “toned” looks, creating low-sat and high and low key, as well as infrared and threshold interpretations. The tools are many and varied, but what is most important in this class is defining a look and emotional feel to your prints that makes the effort worthwhile, an effort that makes you look at them in silence and know that you have expressed something from within yourself.
The workshop is limited to only 15 students so make sure you sign up quickly to reserve your spot.
Shooting Icebergs from a Zodiac
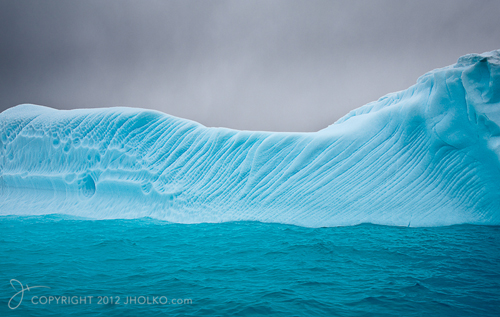
This article was written by Moab Master, Joshua Holko
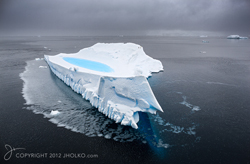
One of the most exciting and enjoyable aspects of a photographic trip to Antarctica is the opportunity to climb into a zodiac with like-minded photographers and spend countless hours cruising amongst the spectacular icebergs and glaciers that line the Antarctic Peninsula. For the photographer with a penchant for icy landscapes it just doesn’t get any better, and the opportunities are virtually limitless.
Cruising in a zodiac is one of the best ways to photograph icebergs since it puts the photographer at sea level, enabling wonderful perspective opportunities that are impossible to achieve aboard a large ship. Zodiac photography also provides you with the opportunity to get very close to even relatively large icebergs, thus enabling you to create dramatic photographs through the use of wide and ultra-wide angle lenses. If your zodiac driver is keen and fearless enough then in many cases you can even get close enough to touch some of the more stable icebergs (as I did on several occasions). If you are super keen then you may even be up for a polar plunge, as one member of my group recounted from a previous expedition.
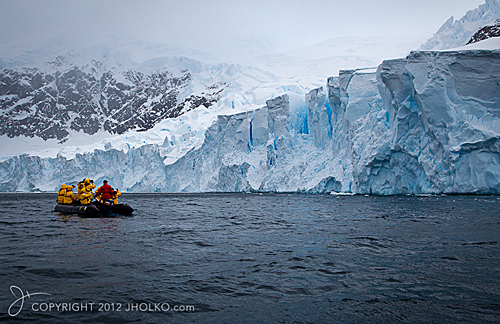
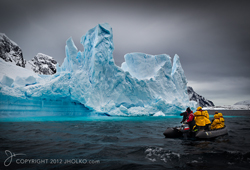 During my last Antarctica trip I spent over twelve hours cruising in zodiacs with other photographers, which provided ample opportunity to not only photograph icebergs, glaciers and penguins, but also to place other zodiacs and people in the frame to provide a sense of scale and context to some of the photographs. I normally work very hard to exclude the hand of man in my landscape photography, but in several instances it provided the perfect counter point to complete and balance the frame.
Whilst the idea of wrestling with camera gear in a pitching zodiac on Antarctic seas with ten other photographers all jostling for position might sound like less than ideal shooting conditions, the reality is quite different. A zodiac provides a relatively stable shooting platform and can actually comfortably accommodate up to ten photographers (with equipment), a dedicated driver, and still provide ample room for everyone to shoot simultaneously. I never felt cramped or uncomfortable and was successfully able to share the space available with those around me. Usually those on the side closest to the subject kneel on the floor of the zodiac with their arms resting on the pontoon. 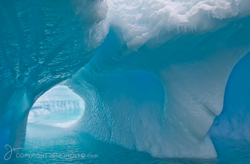 This provides a very stable platform for handheld shooting. Photographers on the far side of the subject can then stand and shoot over the top of those kneeling in front of them. The zodiac driver would always do a few passes, thus enabling everyone to get the shot from several vantage points. Because a zodiac is a small boat and is constantly moving, it is important to keep shooting whenever the subject is in frame since the composition is constantly changing. There is very little time to properly compose a well-considered frame before the angle of view has changed. Instead, the challenge becomes one of selective editing later on.
Photography from zodiacs does require some additional and necessary equipment, including thermal clothes, waterproof jacket and pants, self inflating life jacket, and rain covers for camera equipment. One of the biggest challenges is protecting camera equipment from salt spray, sleet and snow. During several of my zodiac sessions we were buffeted by high winds whipping up spray as the zodiac moved through the sea. We also experienced heavy snow, driving rain and sleet. During several trips I had my camera equipment completely soaked and was very glad of the weather sealing of my 1-series Canon cameras, which operated flawlessly. Several Canon 5D MKII cameras were not so fortunate and succumbed (albeit temporarily) to the harsh, wet conditions. I recommend carrying at least one cloth suitable for drying the front element of your camera lens and a separate bag in which to keep it dry.
In terms of positioning I found it generally best to sit toward the back of the zodiac to avoid the worst of the salt spray that is inevitably thrown up at the front of the boat. However, there is no free lunch at the rear either, where the fumes of the outboard engine’s exhaust can become somewhat nauseating after a period of time and gave me a headache on more than one occasion.
 The choice of lens when shooting from zodiacs is an important consideration in your planning since it is quite difficult to swap lenses without ending up with a camera full of salt spray, rain or snow. In fact, even swapping out small SD memory cards can be a challenge in a pitching zodiac whilst wearing cold weather gloves. On top of this, Antarctica is an incredibly dusty environment and it is a good idea to try and minimize lens changes, or at the very least find a sheltered place to do so. I chose to shoot with both my 1DS MK3 and 1DMKV cameras, as I wanted to utilize prime lenses for the majority of my shooting and dual camera bodies gave me an additional focal length option without having to change lenses. I primarily shot with the 24mm F1.4L MKII and 17mm F4L TSE and occasionally with the 70-200mm F2.8L IS. I am comfortable shooting with prime lenses at the wide end and found these two lenses excellent for the task. Most photographers chose to shoot with zoom lenses when on zodiac excursions since they provide for increased framing possibilities. A zoom lens such as a Canon’s 16-35mm or Nikons 14-24mm will provide for more flexible framing.
A few tips if you are planning your first photography foray on a zodiac in Antarctica.
- Be sure to visit the bathroom before you climb on board. It’s amazing how the call of nature can hit you when you are in the middle of the Antarctic Ocean on a boat full of photographers keen on anything but heading back to the ship so you can relieve your problem.
- Don’t forget to put on your life jacket before you queue up to board. It’s amazing how difficult it can be to put on a life jacket over bulky thermals and wet weather gear whilst in a narrow ship corridor and juggling cameras.
- Carry a couple of dry lens clothes in an easily accessed waterproof bag for drying the front element of your lens. Use rain covers to protect your cameras.
- Carry spare camera batteries and spare memory cards in an easily accessed waterproof pocket. There is nothing more frustrating than being on a zodiac with a flat battery or full memory card.
- Wear sunscreen. Even in overcast conditions the reflected UV light off the icebergs will cook you in a very short space of time. The ozone layer is very thin over Antarctica.
- Wear plenty of warm clothes. Sitting on a zodiac, it is very easy to become chilled to the bone if the weather is poor or the wind is up. It is easy to remove a layer if you get too hot.
- Be considerate of those around you before you stand up or lean in front of someone else. Space is limited on a zodiac and everyone wants to take great photographs.
- Zodiac drivers are often keen photographers themselves and will do their best to put the zodiac in the best possible position for shooting. If you need to get closer or further away you can ask, and I have found they are usually very accommodating.
- Never carry loose pieces of paper or plastic. Antarctica is a pristine environment and it would be very easy to lose these items to the wind.
- Above all else, have fun. Shooting from zodiacs is an incredible experience and it’s important to put the camera down occasionally, have the driver switch the engine off and just appreciate the silence, rugged and raw beauty of Antarctica.
Andy Biggs and Joshua will be announcing a new expedition to Antarctica in late 2013 in the coming months. If you would like to register your interest to be one of the first to be notified when the trip is announced you can email either Andy or Joshua at info@andybiggs.com or jholko@bigpond.com
Tips on taking better flower photos
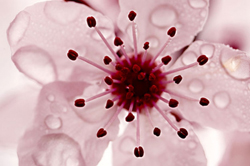 "Flowers are one of the most photographed subjects on the planet, which makes taking a compelling photo of them that much more difficult. Experienced pro, Harold Davis shared a few strategies with [POP Photo] about getting the best out of your floral photos."
Enterprise arrives in New York

"Have to say that just when I thought I had experienced “it all” shooting my shuttle/Hubble project, seeing the 747 flyby the field that morning was breathtaking.
With so much enthusiasm from the range of kids to adults in attendance, it’s challenging to believe that there is limited congressional support for American human space flight!"
Here are some more of Michael's images from that day
Artful Exhibition
Our friends over at Crockett & Co. tuned us into this awesome article on Photomation's blog about using Entrada Rag.
Harold Davis becomes a Moab Master
 We are excited to announce the addition of photographer Harold Davis to our Moab Masters program. Harold is a renowned photographer, artist and author who offers a unique vision and voice to the Moab Masters program.
Harold’s meticulous printing skills are present in every print he produces, and we’re thrilled that he chooses Moab as the paper to support his images.
“I adore working with the hand-crafted Moab substrates, and in particular I am infatuated with Slickrock Metallic for much of my printmaking. It is bold and dramatic, and at the same time paradoxically subtle. In my monochromatic imagery I strive to extend the dynamic range, and Slickrock supports this with a multidimensional look. Slickrock prints show an incredible range of tonality in both color and black & white. It's also particularly interesting the way the metallic pearl transposes for white---one impact is that Slickrock prints shift in their presentation of negative space as the light they are viewed with also shifts. Highly recommended!”
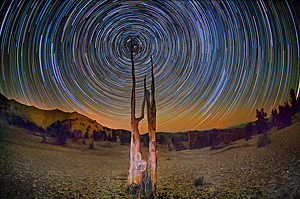
Michael Zide on B&W Landscapes

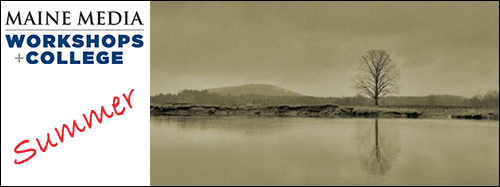
One of our favorite B&W photographers will be leading a week-long workshop this summer at the Maine Media Workshops. Michael Zide will be teaching a class titled, As You See It: Finding Your Creative Voice from July 1-7, 2012.
Those signed up for the workshop are in for a special treat as Michael will be joined by print master, Jim Roselli of Xact Studios. This tag-team duo will present the hands-on essentials of B&W landscape photography and fine art image output. Click here for more details about Michael's class.
Note: last year's workshop sold out and had a waiting list so be sure to register early.
Ryszard Horowitz @ Hallmark
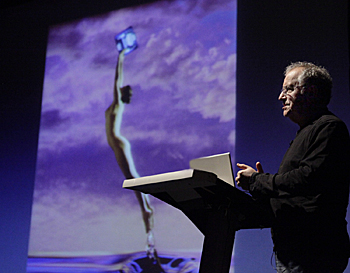 Last night, Ryszard Horowitz - Moab Master and Canon Print Master - gave a four-hour presentation at the Hallmark Institute touching on his early jazz work, his commercial photography and his epic commissioned projects.
Horowitz is a true pioneer in photo composition with a rich career spanning over five decades.
This was the first time that I had heard his talk and was mesmerized by his forward-thinking images and behind the-scenes stories. Horowitz's work combines artistry with art history breaking every rule to compose an image in his unique voice.
His parting wisdom was to dream big and let nothing stand in your way - especially to those who say it can't be done.
Moab's New Vimeo Channel
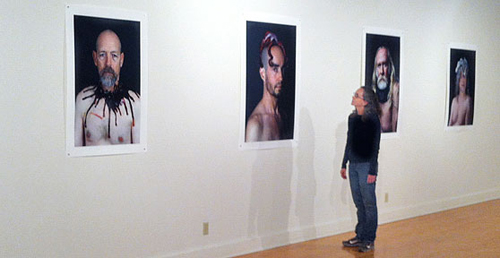
Michael Soluri on Documentary Portraiture

This summer up at the Maine Media Workshops, Moab Master, Michael Soluri will conduct a week-long workshop from June 3-9 delving into the secrets behind capturing the perfect portrait.
By a perfect portrait, we mean being able to get to the heart and soul of the subject. The workshop will cover both the natural and technical aspects of shooting on location with limited (often available) light sources and equipment.
The class will touch on every aspect of production with an added emphasis on post-production to obtain the perfect printed image (on Moab's Entrada, of course).
Learn more about this workshop here, and be sure to register early as the class is limited to 14 slots.