Subtotal: $0.00 Cart

  • the source of our inspiration


    premium, archival fine art inkjet papers wrapped in the intimacy of a rural culture

    @Jenniferking_photographer
  • Free MOAB classes


    videos and livestreams released weekly

  • juniper baryta rag


    our best reviewed and most award-winning paper yet

Cameras and Cocktails, a Happy Hour with Glazer's & The Collective

0820_Cameras_Cocktails.jpg

When: Mon, August 20, 2018 6:30 PM – 8:00 PM PDT

Where: The Collective, 400 Dexter Avenue North, Seattle, WA 98109

Register Here

Join us for an evening of conversation, photography and printing at The Collective! The Collective is a wonderful, urban basecamp in South Lake Union. Their space is dynamic and beautiful, offering nooks for conversations or a full restaurant experience.

This will be a great opportunity to hang out and network with your fellow photographers, while enjoying some snacks. Moab Paper will be on hand to chat about printing, paper and create prints for attendees! Be sure to bring 1-2 images on a flash drive/memory card to have a print created on Moab Paper.

Putting Together Your Own Gallery Exhibition

Article content by Les Picker & Robert Boyer:

099A8705.jpg

Putting on a gallery exhibition is both an exciting and exhausting experience. Image selection, post-processing, printing, matting, framing, and packing your framed prints are each mentally challenging tasks that require inordinate amounts of time and energy. 

I'm often surprised at a huge marketing opportunity that photographic artists pass up that would enhance both sales and reputation. After all, a successful gallery exhibition is not only about showcasing the prints themselves, but the opportunity to sell them and to enhance one's reputation in the highly competitive world of art prints. 

And, for most of of us who do our own printing, the opportunity is right in our hands!

The Catalog

099A8673.jpg

A good art exhibition should have a catalog of the images being presented. The catalog might include the name of the piece, its price and perhaps a brief description of the image, often accompanied by the image itself. 

Catalogs come in many shapes, sizes and formats. In many cases the catalog provides utilitarian value, an inventory of the art work to be primarily used by the gallery for reference. I see these catalogs as of limited value. Their limited accessibility minimizes their effectiveness. While it's certainly fulfills a necessary requirement, it does not take advantage of an immense marketing opportunity for the artist. Catalogs should use design and materials that reflect the feel and intent of the art they represent. They should also be widely distributed and worthy as a keepsake unto themselves. The goal of these ancillary materials, after all, should be to elevate the art pieces as a whole. 

How We Do It

For my latest exhibition, WildEarth: Monochrome, all our large format images were printed on Moab Entrada Natural, Moab Entrada Bright, and Moab Textured Rag, using Canon large format printers. In the interests of full disclosure, we are sponsored by Moab, but that mutual decision was based on our experience and love of their papers. As a senior photographer, and as my clients and students know, I am at a point where I would never agree to be sponsored by a product I did not believe in. 

Our Catalog

099A8677.jpg

For the WildEarth exhibit, we wanted to integrate the luscious papers themselves into the art experience for the patrons. We designed and printed the catalogs on Moab Entrada Bright 300GSM 13" x 19" sheets. We then scored the paper in the middle, creating a perfect fold. All it takes is a very light score with a brand new blade to achieve the crisp fold we sought. 

Invitations To The Opening

099A8689.jpg

Similarly, we created accessory marketing materials that were both consistent with our artwork and integrated with the theme. These consisted of a small announcement/invitation and a set of four gallery cards. 

The invitations were printed 4-up on an 8.5" x 11" sheet of Entrada Natural 300GSM paper, utilizing both sides and then cut. For variety, we printed them with a dark and a light background. These were mailed to a select list of clients six weeks prior tot he Opening and were also placed in strategic locations in the gallery and other venues. 

Gallery Cards

099A8726.jpg

The gallery cards were actual copies of two of the wildlife images and two of the landscape images that were on display in the show. They were also printed on Entrada Natural 8.5" x 11" 300GSM paper, two to a sheet and then cut. The reverse side contained marketing material about Les Picker Fine Art Photography. 

It would be hard to describe the positive reaction we received at the Opening for the supporting materials (and thankfully for the fine art prints themselves!). There were literally dozens of people who commented on the feel and texture of the Moab Entrada paper and in at least two of the cases, that tactile sensation helped sell prints.  

Having supporting marketing materials that elevate the artwork and are consistent with their mood and feel are what museums and significant galleries do as a matter of course. As a small studio ourselves, we completely understand that most photographers do not have a dedicated person or team to do this. But that does not mean it should not be done. We look at the production of the artwork itself as just one step toward a successful gallery show. Yes, this is a difficult and laborious task, but the end result is both satisfying and, hopefully, financially rewarding. 

So, next time you are contemplating an exhibit of your artwork, think in terms of integrating the art with the marketing materials.

Ecotomes by Jonathan Morse at Currents New Media 2018

A curated room by Jonathan Morse at Currents New Media in the Santa Fe Railyard, Santa Fe, New Mexico running through June 24 with images on Juniper Baryta Rag.

jonathan_morse.JPG

Jonathan's work contains twenty-four 24" x 36" prints on Juniper Baryta Rag. "It's my favorite paper, makes the saturated color jump."

Other artists shown are Gregory Eddi Jones, Anastasia Samoylova and Danielle Ezzo.

"ECOTOMES (transitions between ecosystems), a quiet room in a sea of interactivity.  Photography’s invention caused a shout: “from this day painting is dead”.  New media is evolving media; from stones and pencils to paintbrushes and presses and onward to virtual reality, artists-cyborgs use available technology to make their mark.  Every iPhone image relies upon millions of lines of code; every image we make (and see) involves millions of neurons.  Cameras and computers are prostheses for the artist, in a good way: not to replace but to augment what it means to be human.  Photography has not depicted what is “real” since it’s inception; that train left long ago.  But it retains its evocative nature to simulate the real (a construct of our brains processing visual intake) when contrasted with digital marks.  Here we air the ongoing dialog between our organic selves and our digital allies and influences." - Jonathan Morse
ECOTOMES 3 © Jonathan Morse 2018

ECOTOMES 3 © Jonathan Morse 2018

ECOTOMES 4 © Jonathan Morse 2018

ECOTOMES 4 © Jonathan Morse 2018

See more of Jonathan's work at www.jmorseart.com and go to the festival's website at www.currentsnewmedia.org.

6 Reasons Why Photographers Should Print Their Photos

Photo1.jpeg

In an age where we rely on technology for just about everything that we need, we tend to neglect or forget about the analog aspects of life. This is particularly true for the media we consume, which are largely in digital format—people rarely keep physical media like videotapes, audio CDs, and of course, printed photos.

For instance, most photographers today have thousands and thousands of images saved on their memory cards and other storage devices, but have little to no printed copies. Unlike earlier analog photographers who had to use darkrooms to make prints just to be able to see their images, many shutterbugs of the digital era no longer keep physical copies (whether on film or in a printed photo) of their work.

But what happens when you lose all of the digital photos you saved in your computer or shared online? That’s where printing comes in.

You might be wondering why printing is important—especially for photographers, who tend to share their work solely on their online websites or social media pages. Here are some reasons why photographers (like yourself) should consider printing their photos:

1. It’s a better way to look back at old memories.

Do you ever find yourself wanting to reminisce about the past? Baby pictures, family reunions, high school parties, weddings, and the like? Having these precious memories on print is a better option for when you’re feeling a little nostalgic. Why? It’s simply a better experience to be able to go through a photo album as opposed to swiping left or right on a mobile device, or pressing buttons on a computer.

Another upside to having prints is you can display your favorite shots (or your most treasured memories) in your home or office. After all, what’s the point of taking all those beautiful pictures if you’re going to keep them stuck in a digital device? All you need is a good printer and some fine art paper, and you’re all set to enjoy those photos in a more meaningful and tangible way.

Photo3.jpeg

2. They technically last longer than digital copies.

Unlike digital pictures, actual printed copies have a longer lifespan. Think of it this way—you most likely still have copies in your family albums of decades-old photos from when your parents (or grandparents) were still young. Sure, they’re pretty battered and discolored, but they’re still there. On the other hand, the same probably can’t be said for those random selfies or artsy photos you saved on MySpace or Friendster.

When you upload pictures to social media, photo hosting sites like Flickr, or to paid cloud storage servers, there’s always a chance that they will get permanently deleted. The same goes for your computer storage or your hard drive. They can get corrupted or even lost—which means you lose your photos in the process.

If you want to get started on printing your work, make sure to choose high-quality photo paper to ensure the longevity of your prints.

3. You can display them anywhere you like.

Another advantage of printing your photos is that you can display them anywhere. As a professional photographer, you’d want to show off your best work, whether in your home, at your office, or in your studio.

Many photographers these days are content with displaying their work on social media, but there’s still something more impressive and organic about having large, blown-up prints of your favorite photos. It really shows off your skill, because plenty of photos can look good on a computer or mobile device, but not all of them will look good in print.

Photo2.jpeg

4. It makes you a better photographer.

Nowadays, thanks to Instagram, pretty much anyone can be a photographer. But as previously mentioned, it’s easier to shoot photos for social media than for print, and by printing your work, you force yourself to really perfect everything down to the last detail and ensure that your shots look good on both print and digital.

Printing also allows you to understand your work better. How? It helps reveal things you wouldn’t have normally seen on a digital screen. Seeing your photos in print will allow you to see what your (and your camera’s) strengths and weaknesses are.

5. You get to learn a new craft.

Photographers spend years learning how to use their cameras—but they usually don’t stop there. Back in the days of analog photography, you had to learn how to use a darkroom and develop your own photos. These days, photographers no longer need to learn how to develop film, but they do need to learn other skills, like basic photo editing and digital manipulation. Some even take it a step further by learning how to properly print their photos as well.

Printing your photos allows you to learn a new craft—from understanding color management down to choosing the right printer, ink, paper to use in order to produce high-quality prints of your work. Once you master this part, you increase your skill set as a photographer.

And the best part? You won’t have to pay someone to do it for you.

6. It allows you to expand your photography services.

Adding photo printing to your photography package allows you to provide a more comprehensive service. Aside from giving you the option of earning extra cash, printing gives you the opportunity to deliver the best possible output for your clients. After all, imagine taking the time and effort to capture all of those perfectly composed and exposed photos, only to have them look horrible once the client has them printed elsewhere.

When you do your own printing, you retain control over image quality, size, and the overall presentation, so you get to ensure the quality of the final product.

Printing allows you to become a full-service photographer, which can help you attract both potential and long-time clients and take your business to the next level.

Photo4.jpeg

Visit Moab at WPPI!

Why attend?

Be the first to see our new Flint Portfolio. An ultra-modern screwpost portfolio used to create a stunning presentation. The innovative adhesive hinge strips allow any Moab Paper to be applied.

Grab a sample of our new Entrada Rag Textured paper. A defined, yet subtle texture with the same superb printing qualities as the classic Entrada smooth. A nice alternative to the traditional smooth finish.

IPHF Announces 2017 Award Winner and Hall of Fame Inductees

IPHF logo.JPG

The International Photography Hall of Fame and Museum presents the 2017 class of Photography Hall of Fame inductees, and first-ever Lifetime Achievement Award recipient.

  • Kenny Rogers, singer, songwriter, record producer, actor, photographer, and author, will receive the 2017 IPHF Lifetime Achievement Award, the first of its kind awarded by the IPHF.

Nine photographers or photography industry visionaries who demonstrate the artistry, passion, and revolution of the past and present craft of photography are selected for induction to the Hall of Fame, including:

  • Harry Bensoniconic portrait photographer
  • Ernest H. Brooks II, black-annd white underwater photographer
  • Edward Curtisphotographer of the American West and the North American Indian
  • William Egglestonpioneer of color photography
  • Anne Geddesportrait and infant photographer
  • Ryszard Horowitzpre-digital special effects photographer
  • James Nachtweyphotojournalist and war photographer
  • Cindy Sherman, conceptual portrait photographer
  • Jerry Uelsmannphotomontage photographer

A huge congratulations to one of our Moab Masters, Ryszard Horowitz

The 2017 Awards and Induction Event will take place on November 17th, 2017 in St. Louis, MO.

For full information, read the Press Release here.


Putting Epson’s New SureColor P5000 Inkjet Printer to the Test

By Theano Nikitas for Rangefinder Magazine

The Epson SureColor P5000 is the successor to the (still-available) Epson Stylus Pro 4900.

The Epson SureColor P5000 is the successor to the (still-available) Epson Stylus Pro 4900.

Epson inkjet printers have been a staple in photographers’ studios for many years and with good reason. Each generation of hardware and inkset elevates photo printing to new standards. That trajectory continues with the SureColor P5000, Epson’s latest 17-inch desktop printer. (The company recently rebranded its familiar Stylus Photo/Stylus Pro lines under the SureColor banner to unify the brand globally.)

The SC P5000, the successor to the still-available Stylus Pro 4900, retails for $1,995 (Standard edition, reviewed here). Commercial and Designer editions are also available for $1,995 and $2,495, respectively.

Featuring a 10-color UltraChrome HDX pigment inkset, the P5000 utilizes 200mL cartridges, adding orange and green inks to the mix as well as cyan, light cyan, yellow, vivid magenta, vivid light magenta and three levels of black (Photo or Matte, light black and light light black). The printer is also equipped with two maintenance tanks for depositing excess ink, including one for borderless printing. Built-in roll printing and a high-capacity cassette complement front and top paper feeds. An optional SpectroProofer is also available.

Beyond additional inks, the P5000 offers a broader color gamut, 1.5x higher density black levels and twice the print permanence of its predecessor—up to 200 years for color and up to 400 years for black and white.

PRINT QUALITY

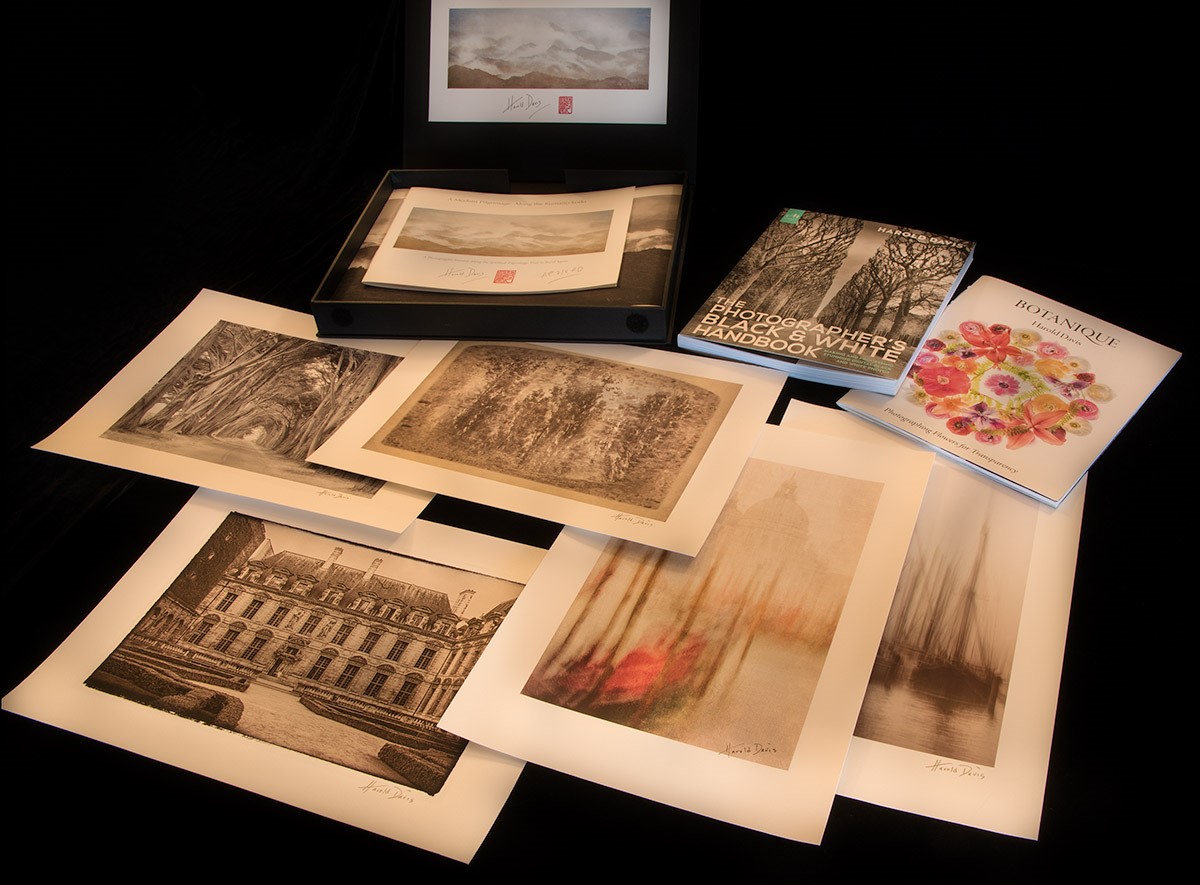
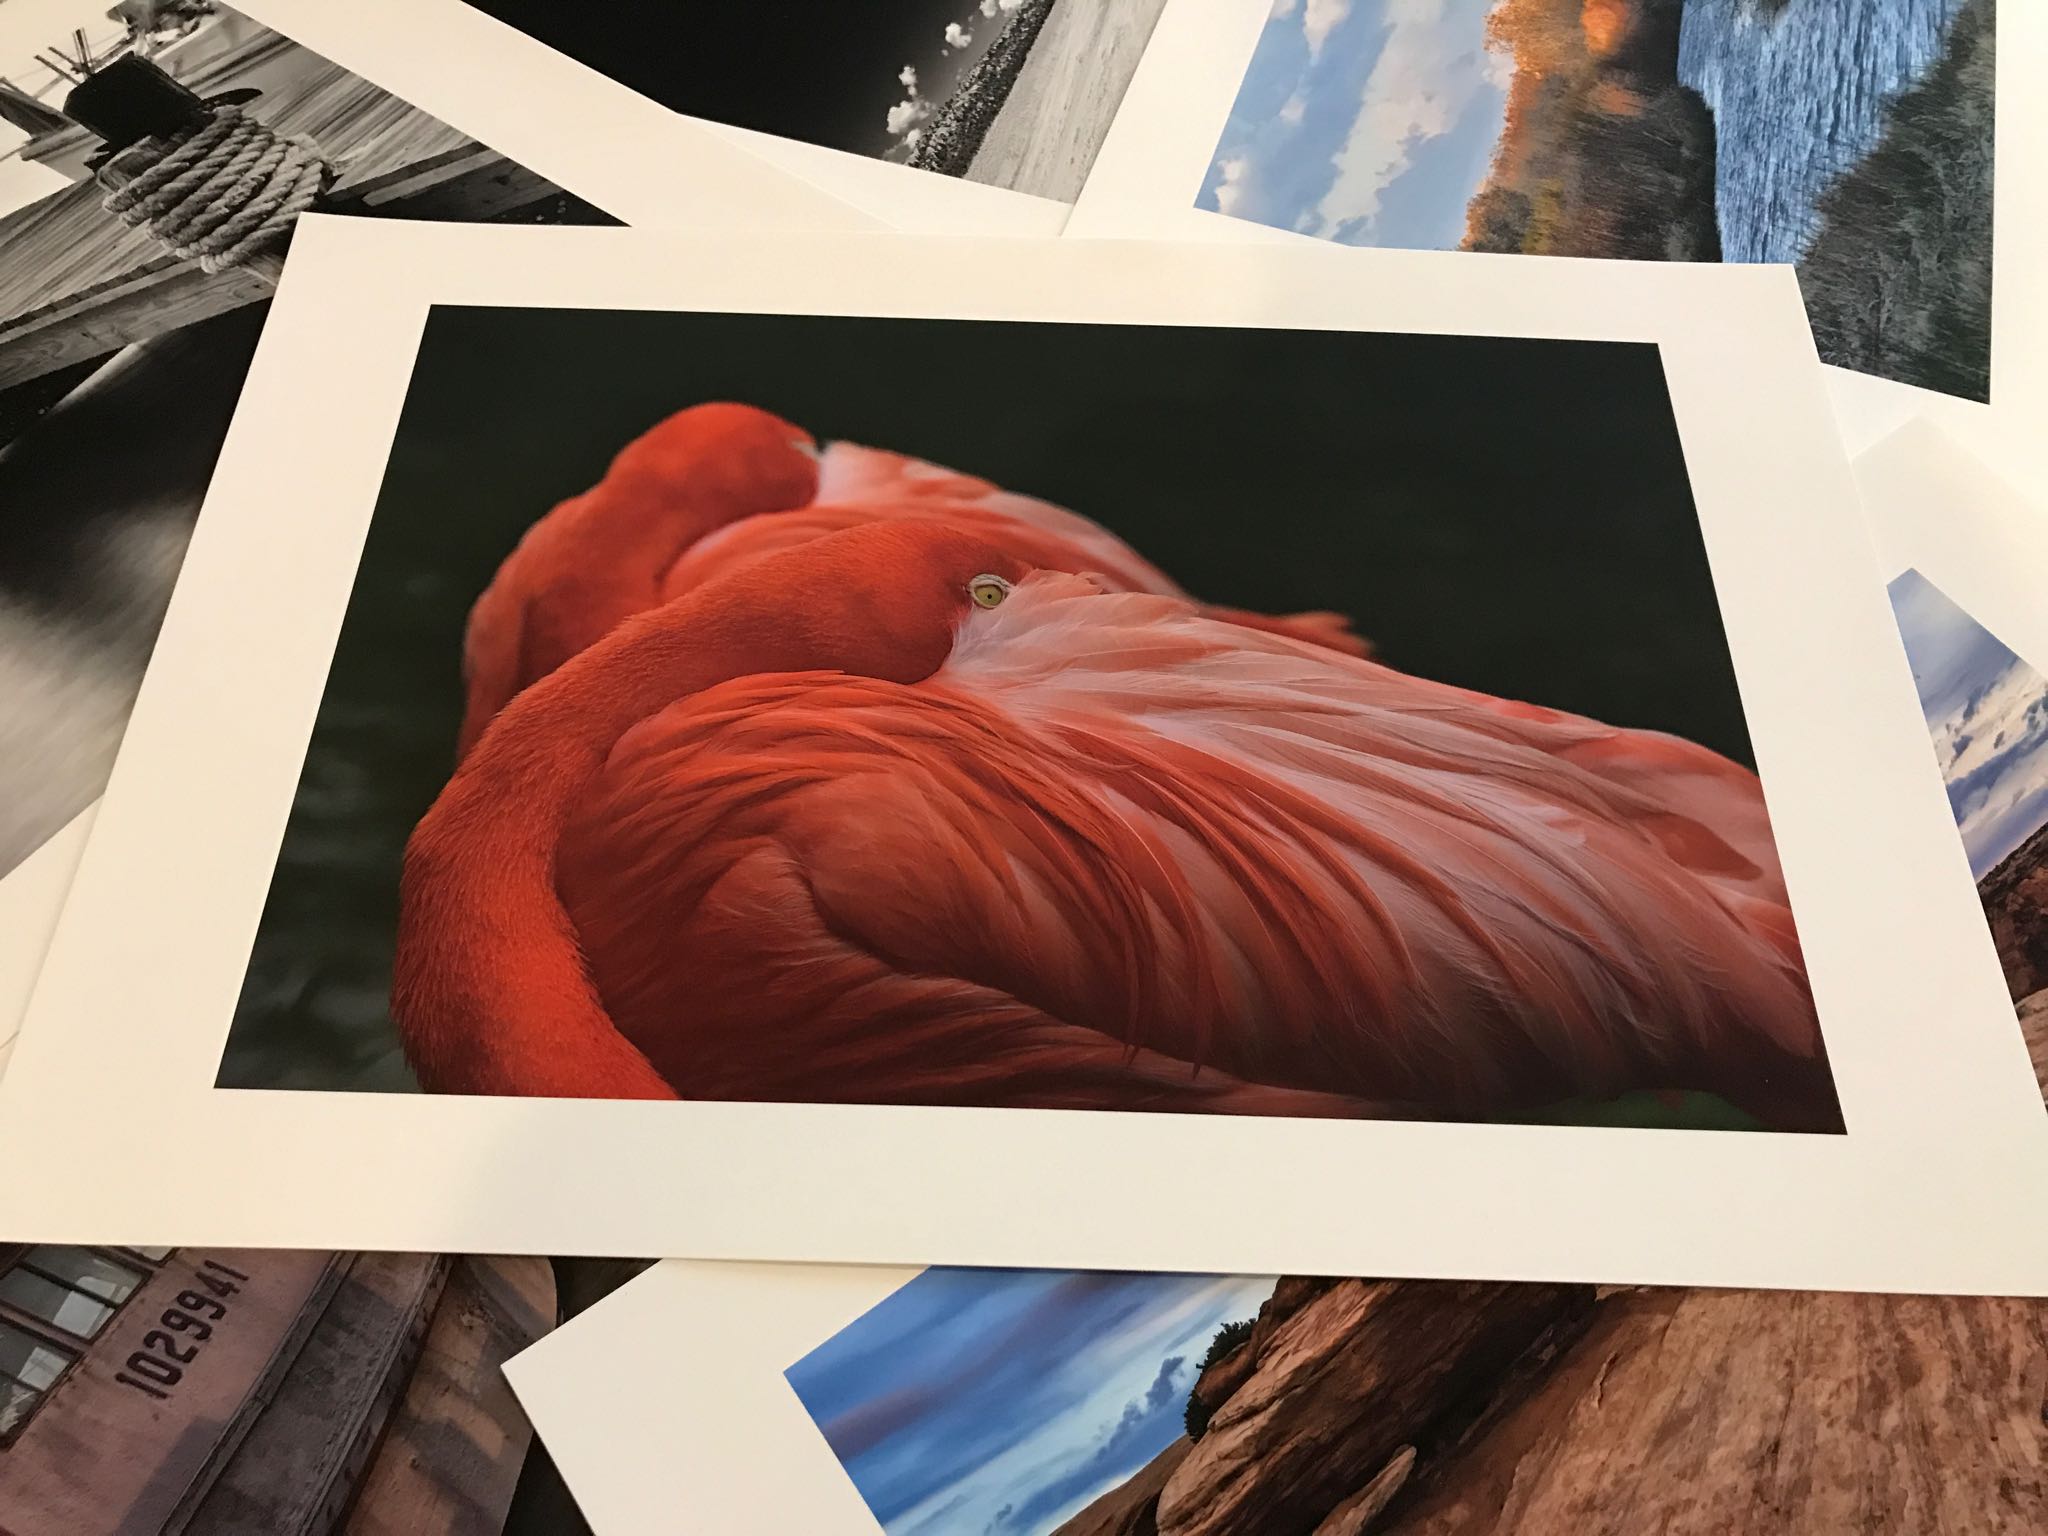
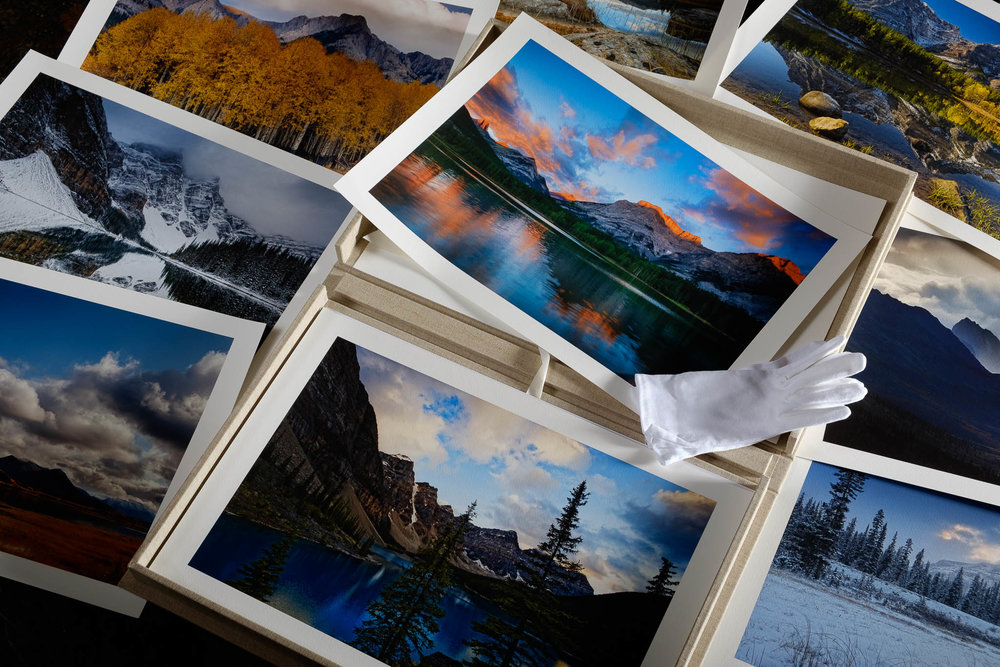
As expected, print quality is superb. I printed a variety of color and monochrome images on several different glossy and matte papers including Epson’s Legacy Platine and Moab’s brand new Entrada Rag Textured 300 (scroll down to see the sample image). Colors were beautifully rendered and there was no evidence of metamerism or gloss differential.

The only anomaly I noticed was that shadows were ever so slightly darker than anticipated, especially compared with the same image printed on the Epson Stylus Pro 3880 using the same color-calibrated monitor, same paper and the appropriate ICC profile. This is a result of the denser black inks, which also increase overall contrast, dynamic range and make prints appear sharper.

DESIGN

The SC P5000 is a beast, albeit a handsome one. It weighs almost 115 pounds and, with the exit tray closed, measures 34.0 x 30.2 x 15.9 inches. Unboxing and moving the printer to a sturdy table is definitely a two-person job. Setup is easy, albeit a little time-consuming; plan on 45 minutes to an hour, at best, until it’s ready to print.

This well-designed printer is equipped with Gigabit Ethernet and USB 2.0 ports, a built-in rotary cutter and a full-color LCD control panel to choose paper types and other settings. The latter, along with a large alert lamp on the top of the printer, provide important notifications about ink status, paper feed issues and more.

Speedy and quiet printing is the norm, although fan noise is noticeable when it kicks on. The fan is not exceedingly noisy, but I wouldn’t want to be next to it when making a phone call.

WHAT WE LIKED

Print quality is, of course, the main criterion and the SureColor P5000 output— color and monochrome—is gorgeous on a wide range of papers. Setting up and printing with roll paper is exceedingly easy and the user-replaceable rotary cutter produces clean and smooth cuts. It’s perfect for printing panoramas.

Dust protection is a bonus and eliminates the need to find a large dust cover for the entire machine (I don’t mind dusting the outside but always worry about dust reaching the feeds, rollers, etc.). And the user alerts are very helpful since the control panel explains exactly what’s wrong.

WHAT WE DIDN’T LIKE

I only have a few complaints. Marring the overall excellent build quality is the plastic output tray. It doesn’t slide smoothly in or out of the main body and although I don’t think it will break, moving the tray requires a little bit of jiggling. The tray is also a little short for larger/longer prints and there’s no catch basket, so your panorama print will likely end up on the floor if you’re not there to grab it.
The front sheet feed also requires a bit of finessing to precisely align the paper since there’s only a mark (rather than physical guides) to place the media.

And, yes, switching between black inks gobbles up some of that liquid gold. Epson doesn’t release any numbers for how much ink is used in the switching process and I’m unable to quantify it, but it’s visible in the ink level gauge on the control panel.

HOW IT COMPARES

There’s little competition in the 17-inch desktop inkjet printer market. The closest match to the Epson SureColor P5000 (or P4900) is probably the older, 17-inch, 12-color Canon imagePROGRAF PF5100. Paper handling options are the same as the Epson, but the $2,100 iPF5100 has built-in calibration, which is nice. If you don’t print in large quantities, can forgo cassette and roll paper feeds but want wireless connectivity, the $1,300 Canon imagePROGRAF PRO-1000 is a compelling, budget-friendly output option.

BOTTOM LINE

As I mentioned earlier, inkjet printing standards continue to be elevated with each new product, which gives the Epson SureColor P5000 an edge over the older Canon iPF5100. With Epson’s best-in-class print quality and excellent paper handling, I highly recommend the SureColor P5000 for pros who want—and need—the latest and greatest in inkjet printing.

GIVING MOAB’S NEW ENTRADA RAG TEXTURED 300 PAPER A TRIAL RUN

One of the papers we fed the Epson P5000 was Moab’s latest release, which brings texture to one of my favorite papers. The new Entrada Rag Textured 300combines the warmth of Entrada Rag Natural with a slightly textured surface. Although textured paper is not a perfect match for all images or aesthetics, Entrada Rag’s subtlety worked well with portraits of costumed actors I shot for a theatre company’s brochure. Julius Caesar’s robes and breastplate took on a slightly warm tone with enough tooth to give it personality without overwhelming the subject.

This 100 percent cotton 300gsm media is OBA-free and available in cut sheet sizes from 5 x 7 inches to 36 x 48 inches along with 17 x 24 x 44-inch, 50-foot rolls. Cut sheet pricing for a 25-pack varies from $19 to $514, and roll prices range from $140 to $281.

Theano Nikitas has been covering photography for over 20 years. Although she loves digital, she still has a darkroom and a fridge filled with film.

Harold Davis Tests Entrada Rag Textured, Here's What He Thinks...

©Harold Davis. All rights reserved.

Entrada Rag is the superb, acid-free paper that put the Moab Paper brand on the map some fifteen years ago. So as a Moab Master I was honored to be asked to evaluate and test Moab Entrada Rag Textured, the first addition ever to the Entrada Rag line, during the pre-production stage for the paper. It’s great news for photographers and artists that Moab Entrada Rag Textured is now generally available.

Like the original Entrada Rag Bright and Entrada Rag Natural papers, Entrada Rag Textured is of course acid-free. Also like Entrada Rag Natural, it is a 100% cotton paper that is somewhat warm-toned. This is a very thick sheet (300gsm) with a great sense of “hand” that is entirely OBA free, and (like the original Entrada Rag Natural) boasts an extraordinary tonal and dynamic range for a matte paper. Note that Entrada Rag Textured is single-sided, as opposed to Entrada Rag Bright and Natural, which come both in single-sided or double-sided versions. The tonality of Entrada Rag Textured is much like the creamy feeling of Entrada Rag Natural, rather than the very bright white of Entrada Rag Bright.

Entrada Rag Textured has become one of my favorite go-to printmaking substrates. © Harold Davis

Entrada Rag Textured has become one of my favorite go-to printmaking substrates. © Harold Davis

As you might expect, the primary difference between Entrada Rag Textured and the original Entrada Rag Natural is, of course, the texture of the surface. But what you have here is an elegant, refined texture---not an over-the-top "watercolor" paper.

(Above) This image is a long exposure made from a moving Venetian vaporetti. In post-production I lightly texturized it. The blend of the texture and the Entrada Rag Texture helps create a unique and subtle effect. © Harold Davis

(Above) This image is a long exposure made from a moving Venetian vaporetti. In post-production I lightly texturized it. The blend of the texture and the Entrada Rag Texture helps create a unique and subtle effect. © Harold Davis

Just as the warm-toning of the Entrada Rag Natural paper is subtle, the texture that Entrada Rag Textured presents is also subtle. Photographs printed on Entrada Rag Textured will look like art, and the finished print will be a delight to handle as well as to look at. In other words, Entrada Rag Textured charts a middle "Goldilocks" course: textured, but not too textured. It is a paper that is indeed "just right", and makes the image look great, not a paper that is so "too-too" that the presentation becomes about the paper rather than the photo.

Of course, like any high-end specialty paper designed for modern photographic printing, Entrada Rag Textured is not one size fits all. It works better with some kinds of images than others. To get a sense of the kinds of images that really "marry" well with Entrada Rag Textured, and to learn what this paper does best, we made numerous test prints in my studio using my large format printer.

One thing I found is that this is a paper that really works well as part of the print presentation. In other words, I would never print right up to the bleed-line (edge) with Entrada Rag Textured. It makes much more visual sense to allow the paper to show around your image---and to strongly consider the imposition and spacing of the print on the paper as an integral part of printing-making with Entrada Rag Textured. Showing an inch or two (and sometimes more!) of Entrada Rag Textured around the borders of any image enhances the art print and gallery effect of this paper.

To emphasize the antique look in this print I added a border before printing it on Entrada Rag Textured. © Harold Davis

To emphasize the antique look in this print I added a border before printing it on Entrada Rag Textured. © Harold Davis

The combination of a moderate warm tone, refined texture, and high dynamic range is a pretty spectacular set of characteristics for any paper, and helps to make Entrada Rag Textured a winner that is appropriate for a wide range of images. Of course, it is not, never will be, and should not be used like you would use a more glossy photo paper (glossy papers with a more "photographic" finish of course have a great place of their own in the world). So in my experience, the images that work best with Entrada Rag Textured are artful, and intended as art (as opposed to, for example, journalistic-style imagery).

With monochromatic imagery, I would strongly consider toned or somewhat old-fashioned photos (as opposed to "straight" black and white) for Entrada Rag Textured.

The subtle mid-tones of this photo of a row of cypresses is a great match for the ability Entrada Rag Textured has to render subtle tonal gradations. © Harold Davis

The subtle mid-tones of this photo of a row of cypresses is a great match for the ability Entrada Rag Textured has to render subtle tonal gradations. © Harold Davis

With color imagery, I get great results essentially across the gamut of landscape photography, particularly in imagery where the real strength is in separation of mid-tones. My personal preference on Entrada Rag Textured is for color imagery that has elements that echo antiquity, and so lie in the cross-roads between modernism and older traditions of printmaking and art.

There’s no doubt in my mind that Entrada Textured Rag has become one of my "go-to" printmaking substrates. Combining high quality reproduction with a sensitive and sensuous surface that is entirely fiber, I expect to be making prints with Entrada Rag Textured for a long time to come.


(Left) The rendering of the structure underneath the Art Deco Yaquina Bay Bridge in Oregon is a good fit for Entrada Rag Textured: the paper shows and holds details, even in the areas that are almost black. The paper handles ink well and doesn’t overload, even in very dark areas. © Harold Davis

Ghosts of the Arctic, A Short Film by Joshua Holko

The product of more than years of planning, Ghosts of the Arctic was film exclusively in the Arctic archipelago of Svalbard in the depths of winter. It is my hope that the film will impart some of the haunting beauty of this incredibly precious and endangered polar wilderness; as well as give you some insight into my life as a Polar photographer. I hope you will take six minutes out of your day; set your display to full screen, turn off the lights, crank up the volume and allow Ghosts of the Arctic to transport you away to one of the world’s most spectacular polar regions in its rarely seen winter veil.
— Joshua Holko

For more behind the scenes information about the filming of Ghosts of the Arctic please visit Joshua Holko's blog.

Is There a Portfolio in Your Future?

We recently completed a 3-day workshop for advanced amateur and professional photographers to help them create their first professional quality fine art portfolios. My hat is off to Norm Arnold, Jim Harris, Lew Rothman and Jeff Wagoner, who spent an intense few days focused on culling, critiquing, post-processing (again and again), printing, sorting, sequencing and finally assembling their art into a coherent and beautiful narrative.

By no means was this a laid back weekend. We started on Friday afternoon and finished on Sunday afternoon. But there was lots more to it than the face time we spent together. For two months prior to the workshop, these brave photographers submitted 50-70 images to us that they were considering for their portfolio. My assistant Bob and I offered our critique and suggestions and set a firm benchmark.They were to show up to the workshop with no more than 30 images!

As if that wasn’t agony enough, the goal at the workshop was to further cull their images to the 10-12 very best ones that would be printed at 13” x 19” for their portfolio. Whew!

As my very capable assistant, Bob Boyer, likes to emphasize, the production of the actual portfolio is really only a by-product of our Portfolio Development workshop. The real goal was to teach these talented photographers how to critically edit themselves, and how to reach out to others for editorial feedback. Self-editing is perhaps the most difficult part of assembling one’s representative work. I know that from my own experience and have heard that from colleagues and clients hundreds of times over the decades. Editing ourselves is something we must do constantly, whether for a portfolio, an exhibit, for our smart phone displays, or just for selecting our best images for showcasing on our desktops. Trouble is, most photographers do not do a good job of self-editing, so the primary goal of our Portfolio Development workshop is to teach those critical skills.

The Rubber Meets the Road

When it came time to actually print the final selections of images for these talented folks, we turned to our trusty pair of Canon Image Prograf 1000 printers. Believe it or not, we churned out 160 prints within 24 hours without a glitch. These workhorse printers are a real dream.

Still, where the rubber meets the road in fine art printing lies in the paper choices one makes, and in our experience nothing beats Moab fine art paper. Yes, Moab is one of our sponsors, but anyone who knows me understands that after five decades in photography I am not beholden to anyone. Bob and I chose Moab carefully after years of experimenting with every major (and some minor) manufacturers’ papers. Not that there aren’t some other fine brands out there - Canson and Hahnemuhle immediately come to mind - but Moab’s line is fine-tuned to the needs of fine art photographers.

Moab actively seeks feedback as they develop new papers. The perfect example of that is their newly released Entrada Textured Rag, which Bob and I are gaga over. Moab asked us, and several other of their Moab Masters, to beta test it last year. Frankly, some papers don’t make the grade and we credit Moab with abandoning those papers even after significant investment of time and money. But Entrada Textured Rag is definitely a winner. I’ll blog more on it soon.

Anyway, our portfolio clients chose to print on Moab’s Entrada Rag Bright, a matte paper, and on Moab’s Juniper Baryta, a semi-gloss. In all cases we chose the heavier weight options for the papers so they would stand up to frequent handling, since the intent of any portfolio is to showcase a photographer’s work to a wide audience.

So Why a Portfolio?

As I said above, a portfolio is a great way to showcase your work to potential clients, family, friends and fellow photographers. But it serves several other purposes that may not be quite so obvious, but just as important.

Portfolios are a wonderful way to group images together. For example, many photographers today create books and ebooks of their travels. In the same vein enterprising photographers create portfolios of fine art prints of those same travels. Some photographers will have those portfolios lined up in their bookcases, ready to exhibit when needed.

Portfolios are a Zen experience as much for your audience as they are for yourself. People who look at smartphone images swipe through them at blazing speed, rarely spending more than a few seconds on each. But hand a person a fine art print and you’ll see them examining it for details, admiring the way the scene is rendered, and even enjoying the tactile sensation of the luscious papers. There is nothing quite like handling a fine art print, one that WOWS! your audience.

But, perhaps the major reason for committing to doing a portfolio is the self-discipline it teaches you about editing, post-processing and finally, printing. When real estate is precious, one tends to take a great amount of time and great care in the selection process. A decent portfolio does not seek to drown the viewer in images. Instead, that critical self-discipline results in a highly select group of perhaps 10-15 of the best images the photographer can put together at that time. It is not a quantity contest, but rather a quality presentation that says to the world, this is who I am as a photographer at this moment. And the beauty of the portfolio is that prints can be swapped out at any time as taste and experience dictate.

From our perspective the Fine Art Portfolio Development was a huge success. But we’ll let one of our clients sum it up for us in an email we received after the event.

The Toughest Print

by Joshua Holko

As many of my regular readers, friends and fellow photographers know, I love to print. For me, the photographic print is not only the final end result of the photographic process, but is importantly the ultimate expression of my work. The online jpeg is nothing more than a poor facsimile of the finished fine art print; where as the finished print is the medium in which I prefer to have my photography viewed. I really wish I could more easily share my printed photographs with a broader audience(Facebook needs a print sharing service!) and whilst it is possible to visit one of the galleries that represent my photography it is not always convenient or possible; especially for those that are not local.

I have in the past written about my need to print and spoken to the fact that I never really feel like I have finished with a photograph until I have made a print. The journey and process is extremely satisfying to me and the print is the final finish line for each photograph. Honestly, not every image makes it over the line, but those that do give me a great deal of satisfaction.

Over the last few days I have been working on a particular print that has proven to be the most difficult of my career thus far and I want to share how I finally achieved the perfect print of this photograph. It’s not a photograph that translates well in an online jpeg (unfortunately the jpeg compression destroys the tonalities), but it is simply wonderful in its final finished printed form. The photograph was taken last winter in Svalbard during my snow mobile expedition and is a layered white-on-white arctic landscape. The landscape was bathed in a very soft ethereal light when I made this photograph and contrast was extremely low. Super dense cold air hung low in the valleys and a subtle gentle fog softened the distant mountains. The darkest part of the scene was a distant rocky ridge-line, but even it was many shades above black.  As a result the scene was high-key, yet it contained no harsh whites or blown out areas. Honestly, outside of getting to this remote location and the freezing temperature (around -30º Celsius) it was not a difficult photograph to make. It has however been a complete bear to process and print.  There are literally hundreds of shades of different white in the photograph with extremely delicate tonalities that require just the right amount of finesse to print. Anything less than perfect results in flat areas that lack depth.

The heart of the problem is that inkjet printers are not equipped with white ink. So, the whitest white one can achieve in an inkjet print is the natural white of the paper you have chosen (and not all papers are created equal). Hence, paper choice is a critical factor in the fine art printing process.  Whilst it is true that lustre and gloss papers have a better d-max (better, deeper blacks) than matt papers I vastly prefer matt papers for their art feel, surface texture and softer finish. I personally find lustre and gloss papers (even the expensive Baryta papers) take away from the evocative feelings I want to portray in my work. As a result virtually all of my printing is on matt paper – specifically Moab Somerset Museum Rag.  Somerset Museum Rag is a 300 gsm fine art paper with a subtle surface texture and a wonderfully high white point (with a good solid black point for an art paper). I have been printing with Museum Rag for many years and I have a very good understanding of the capabilities and limitations of this paper. It is absolutely ideal for printing snow and ice images in my experience.

Before I describe the process by which I achieved what I feel is the perfect print of this photograph I want take a few steps backward and start at the beginning of the process. The real key to making a fine art print is to start with a great capture. Anything less than a great capture will never be a great print – period. By a great capture, I mean an image that has been well exposed with its histogram biased towards the right hand side (without clipped highlights) , sharp where it needs to be and free from excessive noise. Once you have a great capture you need to carefully process the RAW file to bring out the best in the photograph (a totally seperate skill to the capture process). In the case of this photograph I took extreme care with contrast and highlights to gently pull out all of the subtle tonalities in the highlights in the file. There would be a strong temptation amongst many to bring down the blacks in this file until the rocky ridge-line had a hard deep solid black; but thats not how the scene was in reality and such artificial contrast would look extremely unnatural. As subjects get further away from our eyes they naturally loose contrast and bleed off into the distance. Artificially adding too much contrast will add impact, but it does so at the expense of image depth so you have to tread very carefully. This is of course an artistic decision, but in my case I wanted to print the scene as I remembered it and not create something that did not exist in Nature. All up, I probably spent an hour or so processing and re-processing this file until I was happy with the end result. Only then can you consider making a fine art print of the photograph.

At this point the first thing you need (other than an actual printer) is the best profile for your printer, paper and ink that you can lay your hands on. On no account should you compromise on the quality of the profile and on no account should you even consider using a canned generic profile. You absolutely must have a custom made high quality profile that you either made yourself, or had someone (who knows intimately what they are doing) make for you. I make own own profiles with an X-Rite ISIS2 and with a friend using his Barbieri Spectrophotometer. There are key differences between these units so I use both depending on what paper I am profiling.

Assuming you have ticked all the above boxes how do you then print a photograph that is basically a thousand shades of white on a piece of white paper with a printer that doesn’t use white ink?

The answer is you have to understand what the white point of your chosen paper is and what is the brightest white you can print on that particular paper. Without this information you have little chance of actually rendering all those subtle white tonalities and shades in the print. In my case, I started by actually measuring the white point (and black point) of Somerset Museum Rag which turned out to be 90.3 with a Dmax of 3.2. I then used this information to modify my custom profile to ensue my whites would not be blown out during printing.

I then created a test chart as below that has shades of white and black from 0 (black) to 255 (pure white). I then printed this test chart with my custom modified profile for Somerset Museum Rag, allowed it to dry and then critically examined it in my Graphiclite print booth to see how much highlight and shadow gradation I was actually achieving. In my case (and with my eyes) I can see highlight detail in my test print all the way up to 253 and shadow detail all the way down 5. Anything below 5 is the same shade of black to my eyes as the 5 shade. In the highlights anything above 253 (254 and 255) appear as paper white to me. This is an exceptional result on a matt paper and is testament to the quality of the profile used to make the print.

Armed with this information I now knew that anything in my file that was above 253 would render purely as paper white and anything below 5 would render as a solid black. In this photograph the blacks are actually all but irrelevant since the darkest shades in the photograph are well above this (but it is an interesting exercise to understand for prints with dark tonalities). I then soft-proofed the image in photoshop with my custom profile and the Relative Colorimetric rendering intent and used a levels adjustment to tweak the highlights. In essence I manipulated the brightest tones in the photograph to bring them down to a point where I could see tonal gradation on the paper. I then used several curve layers to increase highlight contrast in certain tones to compensate for the fact that the front lit paper has a lot less contrast than the back-lit LCD screen. Great care had to be taken with these curves to ensure I kept my highlights under the paper white level. I then made a number of test prints of the photograph making small subtle adjustments to the curve layers to better render the tonalities in the extreme highlights. This was an iterative process that took quite a few prints to get just right.

The end result is to my eyes absolutely perfect in terms of its rendition of tone in the highlights. The soft ethereal mountains are perfectly rendered with all of the mystical feeling I remember when I took the photograph. The rocky ridge-line and gentle snow slopes blend their shades of white perfectly; with the foreground having just the right amount of texture and tone. Although I would never enter this print into a competition (most judges would fail to grasp the difficulty of the print) it was one of the most rewarding I have made in recent times.

If you are not printing your work I urge you to make a start and get those 1’s and 0’s off your hard drive and onto paper where they can fully be appreciated. It is absolutely one of the greatest joys of photography.

Visit Joshua Holko's website here.

Artworlds: Digital Art by Jonathan Morse

ARTWORLDS 3 © Jonathan Morse 2016, 24" x 36" limited edition pigment print on Moab Juniper Baryta Rag

ARTWORLDS 3 © Jonathan Morse 2016, 24" x 36" limited edition pigment print on Moab Juniper Baryta Rag

Jonathan Morse created six 24"  x 36" Moab Juniper Baryta Rag prints, up now at Currents New Media 2017, a month-long international festival of new media in Santa Fe, New Mexico June 9-25, 2017.

The prints depict Earth-like spheres that appear to be unraveling or recombining, worlds composed of various designs and colors and overlaying a moiré background pattern. Morse is showing six of a series of eight prints. “They’re about how we create our own art worlds within and without,” he said. In a statement about the work, he talks about how the digital age has made us all editors and directors of our own lives, curating the version of ourselves we present to others through our online profiles. “To understand today’s world requires knowledge of editing techniques that do not remain static and without which we may not know what is going on around us outside our analog selves,” he writes. “Our re-mastered digital constructions now serve as objective correlatives of our inner experience. To repurpose the oft-spoken moviemaking term, we now can fix our lives in post.”
— Santa Fe New Mexican

Read the full article by Santa Fe New Mexican or find more at Currents New Media 2017.

Selling Fine Art Prints

As fine art printing has become easier, more affordable and of higher quality, professionals and amateurs alike are trying their hand at showing their images on paper. At some point, even an amateur might be asked if he or she would be willing to sell a print. That has happened with a number of my amateur photography clients, whose next question to me is how they can sell even more prints.

As a Moab Master photographer, I was curious about the state of the art of selling fine art prints, so I decided to query some of my fellow Masters about their experiences in today's highly competitive marketplace. 

A Problem of Acceptance

Jim Graham is a well-respected generalist photographer from Delaware. Graham has wide ranging experience as a newspaper, editorial, wedding and commercial photographer, although his personal work tends to be more in the fine art realm.

"I find the biggest challenge we face is getting people to understand the value of photography and that it truly is 'Fine Art,'" says Graham. 

My own studio also finds that challenge to be a real barrier at times. Unlike with fine art paintings, people often associate photographic prints with cheap chain store prints. They have little awareness of the amount of time, work and extraordinary expense that has gone into capturing, post-processing and printing a fine art photographic print on museum-quality paper, using archival inks in high-end printers. Most of our clients report that seeing (and touching) a fine art print is a paradigm-changing experience. 

Exposure 

For anyone selling fine art pints, professional or amateur, a key factor is getting enough exposure. Putting likely buyers in front of fine art prints is the name of the game. 

Scott Barrow, another Moab Master, is a location photographer shooting a wide variety of assignments. He owns a gallery in The Berkshires of Western Massachusetts, an area that draws as many as 500,000 visitors in the summer. Approximately 80% of his gallery sales occur then. "We have a short season for gallery sales," Barrow reports. "From November through May we have very little foot traffic."

The challenge of exposure is compounded for those who do not have the luxury of operating their own gallery. One solution is to have one's work represented by an existing gallery. "Selling prints is a continual struggle," says Graham. "Having your work in galleries is a huge help. It tends to legitimize the work as a piece of fine art."  

Not Just the Money

Despite the fact that all professional fine art photographers have to put food on the table, I have never met one whose sole - or even prime - motivation was financial. We all are hard-wired to creatively express ourselves through our chosen medium, no different than a fine art painter or sculptor. 

Graham puts it succinctly: "Selling fine art prints gives me the opportunity to show people another side of my passion for photography. Purchasing prints gives them an opportunity to support that work. The proceeds from the sales of that go back into funding trips and the costs involved in the creation of new work."  

"I love the process of making prints," Barrow adds. "To be able to print an image and hold it in your hands is very satisfying. It’s real. When that photograph is printed on Moab’s Entrada Rag Bright 300 it’s both a visual and a tactile experience. I also like seeing which images people respond to in the gallery. I enjoy sharing my stories with them."

The Internet Myth

If there is one myth that wrecks more photographic dreams than any other it is that all you need is a website to sell fine art prints. That is patently false. None of my colleagues, some of the best print-makers in the world, sell much of their work online. Graham, for example, sells only a small percentage online, but those prints aren’t signed or numbered. 

Scott Barrow sells roughly 10% of his work through his website. However, even in those cases it represents follow-up from people who have first visited his gallery.  

This makes perfect sense when a fine art print might cost anywhere from a few hundred dollars to several thousand. Most informed consumers want to experience the look and feel of a fine art print before committing to purchase.  

Most professional fine art print-makers use the Internet and social media for increasing visibility which, in turn, drives people to see our art in person. 

Tips From the Pros

Given the state of the  market for selling prints, what do professional photographer print-makers recommend to  increase sales of fine art prints? 

Do It Yourself. There is no substitute for taking the time and effort to create your own prints. After all, you created the image. Why not advance your vision all the way through to completion? 

Use Quality Materials. "Printing on fine paper and offering the best presentation in terms of mat and frame truly helps sales," advises Jim Graham. "I find that using Moab papers by Legion, in combination with Rising mat board, has help my sales and consistency of presentation a great deal." I agree. 

Meet and Greet. Surprising to many people, most art sales are the result of face-to-face contacts. "People like to meet the artist," says Scott Barrow. "I spend my summers in the gallery and my experience is that 95% of the prints that sell do so when I am in the space.  No one sells me like I do." 

Invest. Selling high-end fine art prints requires an investment in time, energy and money. Don't expect to be successful right out of the box, but also know that experience, good equipment and fine art papers (like Moab's) will eventually get you there. 


Les Picker is a Moab Master photographer. His studio and gallery is located in historic Havre de Grace, Maryland. Les leads photography workshops throughout the world. 


Portfolio Creation Workshop with Les Picker

May 20th and 21st 2017

A two-day workshop offered by Moab Master Photographer Les Picker and Master Printer Robert Boyer.

Register here. Limited to four participants. 

More about the workshop.

Learn the art of self-critique. Create a hand-made, cloth-covered, boxed portfolio showcasing ten of your finest images, offered in an elegant, state-of-the-art presentation and designed to advance your photographic goals.

Top Ten Takeaways From This Workshop

  • Two-on-one consultation with two experienced, successful, professional photographers to help you curate and edit your work

  • Assistance selecting and post-processing your best images

  • Fresh perspectives on your own work and how to make effective editorial decisions

  • Learn numerous strategies for dealing with your own editorial process

  • A weekend of considered dialog with other serious artists

  • Develop contacts for editorial assistance going forward

  • Experience the value of outside editorial input on your work

  • How the editorial process can shape your art

  • Ten archival prints professionally printed on Moab fine art papers, using state-of-the-art Canon printers.

  • Distinctive, cloth-covered portfolio box, hand crafted in the USA

One of the hardest things to do as a photographer is edit down your work to a cohesive collection of the best and most fitting images, whether it be to support a single theme, single project or the best representations of your work.

What serious photographer does not realize he or she needs to have a professional portfolio to show friends, potential clients, judges at juried shows, or to peruse for their own enjoyment?

In fact, a professionally curated portfolio is essential for success as a serious photographer. Images come alive when carefully selected, meticulously edited and printed on fine art, archival paper. Viewers appreciate the look and feel of museum quality prints.

Yet, in our experience we have found that the majority of photographers either do not have a portfolio to showcase their art, or the one they use is actually detrimental to their success. Unfortunately, photographic portfolios are often poorly planned, poorly curated, and even more poorly executed.

If you are a serious photographer, here is a chance for you to walk home with a beautifully hand-crafted, hand-printed, and carefully curated fine art portfolio that will show off your work to the highest standard in the industry today.